Kitchen Drawer Organizer Guide: Dividers, Trays & Zones
Learn the professional organizing method, avoid common mistakes, and transform your kitchen drawers into functional, beautiful storage spaces.
Jump to section
The Problem With Most Kitchen Drawer Organization
You start with the best intentions. You buy drawer dividers, organize your utensils by category, and take a satisfying before-and-after photo. But six months later? Your carefully organized drawer has descended into chaos.
You're not alone. According to professional organizing research, 80% of organizing projects fail within six months — not because people lack discipline, but because the system wasn't designed to fit real life. In a family kitchen, drawers are shared spaces. Items get returned carelessly. New purchases find their way in without a designated home. The friction of maintaining the system slowly defeats the benefits of having one.
Why Most Drawer Organization Systems Fail
Most drawer organization advice focuses on the products ("buy these dividers") or the aesthetics ("here's what an organized drawer looks like"). What's missing is the process — the methodology behind how professional organizers approach kitchen drawers. They don't start by buying products; they start by understanding your actual kitchen, your family's workflow, and what will actually work in your home long-term.
Retail sites show you Instagram-perfect drawers that no family of four could sustain. Pinterest boards feature aspirational organization that assumes you'll maintain a system that's too rigid for real life. And most DIY guides skip the most important step: decluttering first.
The Cost of Disorganized Drawers
When drawers aren't organized, the costs are real:
- Broken hardware: Overstuffed drawers strain the rails and glides. Soft-close mechanisms break because the drawer is overloaded.
- Wasted time: You spend 5 extra minutes each morning hunting for the right tool while making coffee or meal prepping.
- Wasted space: Without zones, you treat the drawer as a catchall. A drawer that could hold 40 items optimally becomes jammed with 60 items, and nothing works.
- Stress: A chaotic kitchen drawer is a daily reminder that your home isn't as functional as you'd like it to be.
- Food safety: In spice drawers or condiment storage, disorganization leads to expired items hidden in the back, hidden food waste, and potential for contamination if items get mixed.
The good news? With the right process — the one professional organizers use — you can build a kitchen drawer system that actually lasts.
The Professional Organizing Method: 5 Steps to a Functional Drawer
Professional organizers use a proven, five-step methodology that works because it's grounded in real kitchens, real families, and real behavior change. This is the method Tidy Blueprints uses with every client.
Step 1: Empty and Assess
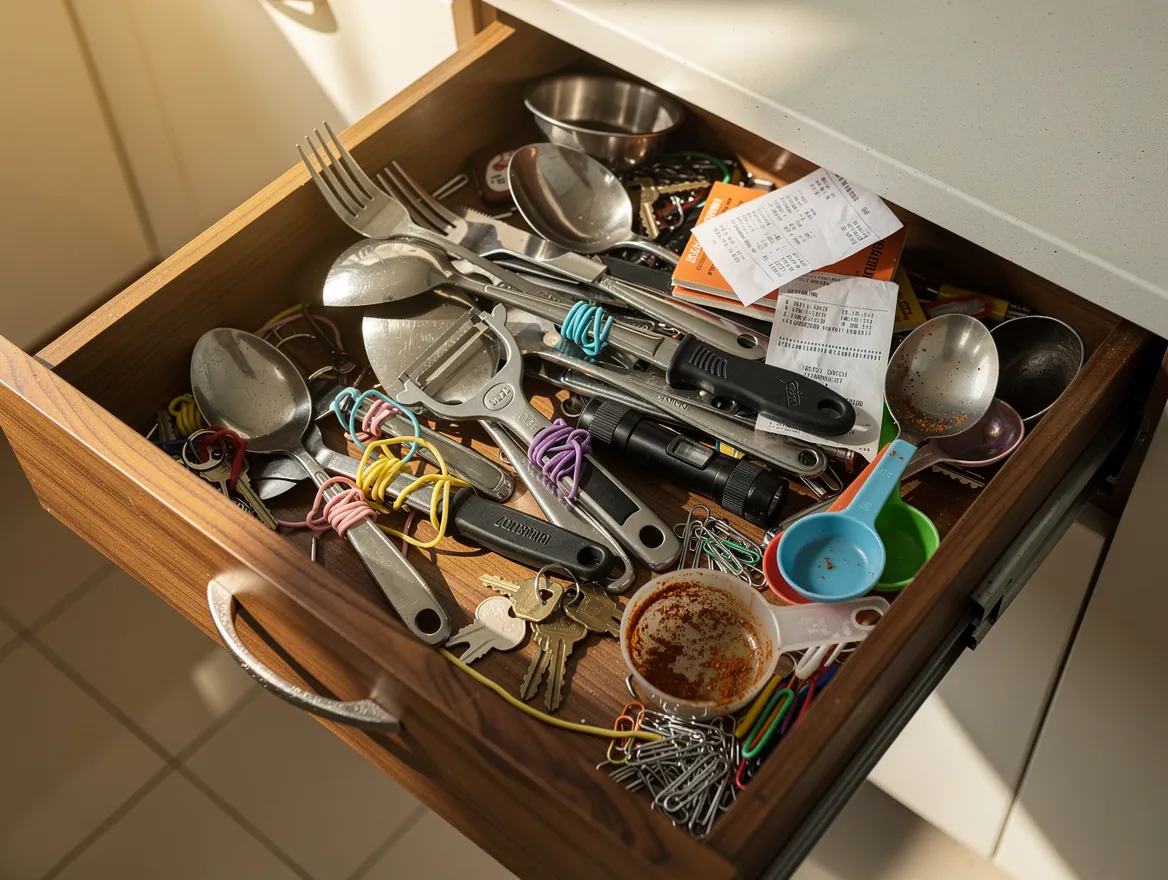
Before you buy a single divider, empty the entire drawer onto your counter. Yes, all of it. This step is critical because it lets you see what you actually have — not what you think you have. You'll likely find:
- Duplicate utensils you forgot about
- Items that belong elsewhere (takeout menus, rubber bands, mystery parts)
- Broken items you've been meaning to discard
- Utensils you never actually use
Once everything is out, wipe down the drawer. A clean drawer is the foundation for a fresh start.
Step 2: Declutter (The "One-Year Rule" and "Spark Joy")
Now sort what's on your counter into three categories: Keep, Donate, and Discard.
The one-year rule: If you haven't used it in a year, it goes. That gadget you got as a gift? If you haven't reached for it in twelve months, someone else will use it. Professional organizers estimate this rule alone removes 30–40% of kitchen drawer clutter.
The "spark joy" principle (inspired by KonMari): Does this item make your kitchen feel more functional or beautiful? If it's broken, dull, or you're keeping it "just in case," it's a candidate for donation or discard.
Multi-purpose rule: Keep items that serve multiple functions. That multi-tool spatula that also scrapes? Keep it. The dedicated deli slicer you used once? Donate it.
Step 3: Organize by Zone (Not by Category)
This is where drawer organization shifts from product-focused to behavior-focused. Instead of sorting by category ("all spoons together"), organize by task or workflow.
Think about your kitchen rituals:
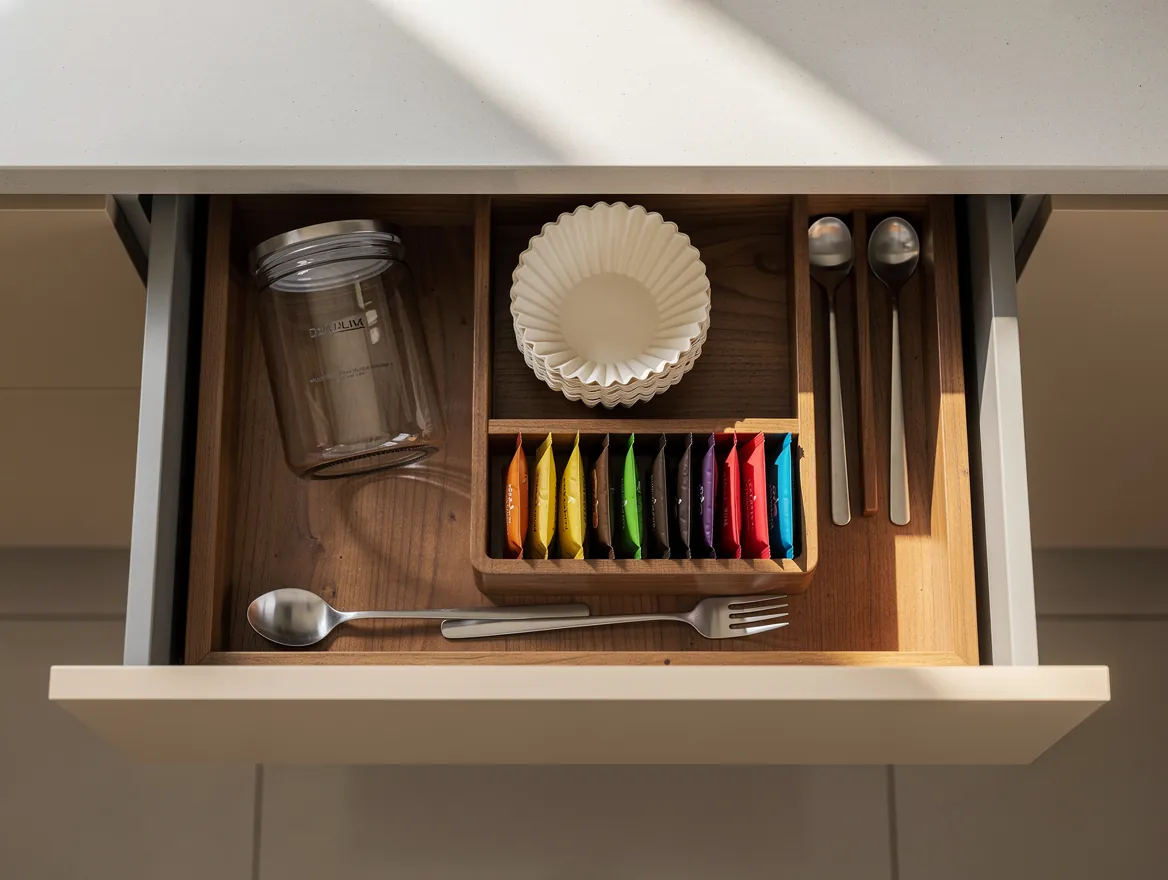
- Coffee station zone: Coffee scoop, filters (if you store them there), sugar spoon — items you reach for during your 7 a.m. coffee ritual.
- Meal prep zone: Knife, scissors, peeler, cutting board clips — tools you grab when cooking.
- Cleanup zone: Dishwasher tongs, scrubbers, pot-cleaning tools — items used while washing up.
- Utensil zone: Everyday spoons, forks, serving utensils — utensils you use multiple times per week.
- Special items zone: Serving spoons, specialty utensils, seasonal tools — things you use occasionally.
Zone-based organization aligns the physical layout of your drawer with how you actually work in your kitchen. It reduces friction because you're reaching for tools grouped by when you use them, not by what they are.
Step 4: Choose the Right Dividers
Now that you know your zones and what you're keeping, you're ready to choose dividers. Not all dividers are created equal.
Options include:
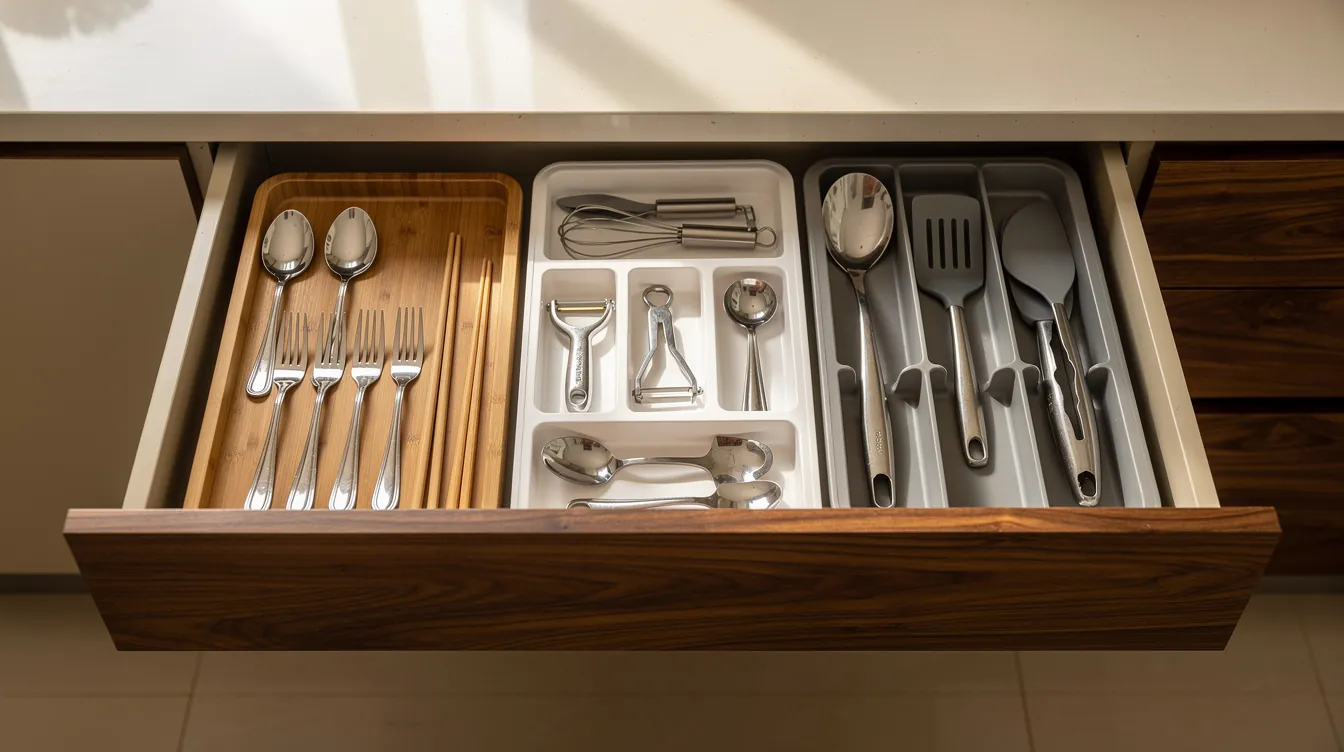
- Expandable compartment dividers: Adjust to fit any drawer width; flexible for different item sizes.
- Bamboo or wood trays: Beautiful, sustainable, fit specific drawer shapes; harder to customize once bought.
- Stainless steel or plastic inserts: Durable, washable, come in modular sets; can look utilitarian.
- Custom inserts: Built-in solutions for modular kitchens; expensive but permanent.
- DIY options: Repurposed containers, drawer liners, or cardboard dividers (budget-friendly starter approach).
Choose dividers based on:
- Your drawer dimensions (measure before buying)
- Durability needs (will it need to support heavy items like cast iron tongs?)
- Aesthetic preference (bamboo for warm kitchens, stainless for modern)
- Budget (premium dividers last longer; budget options work for renters)
- Bangalore climate considerations (humidity can warp wood, rust metal — stainless steel or plastic is often more practical in monsoon season)
Step 5: Label and Communicate
Once items are in their zones, label them. This step is 40% about you remembering where things go, and 60% about your family maintaining the system.
Label options:
- Washi tape with a label maker
- Hand-written labels on kraft paper
- Printed labels stuck inside drawer dividers
- Photo labels ("Meal Prep Zone" with a small image)
Why labels matter: When you live alone, you might remember which drawer zone is which. When you live with a partner, kids, or extended family, labels transform your organized system into something everyone can maintain. Labels say, "This is intentional. This is where spoons go. Please return them here." Without labels, your family guesses, and chaos returns quickly.
Add a quick 15-minute quarterly maintenance ritual: every three months, spend 15 minutes reviewing the drawer. Return items that drifted. Discard expired spices. Adjust zones if your routine has changed. This small ritual is the difference between organization that lasts and organization that collapses.
Common Drawer Organization Mistakes (and How to Avoid Them)
Knowing what not to do is just as important as knowing what to do. Here are the five most common mistakes professional organizers see — and how to sidestep them.
Mistake 1: Overstuffing (The Broken-Rail Syndrome)
The problem: Soft-close drawer rails are engineering marvels, but they have limits. Pack a drawer too full, and the mechanical glides strain, the door won't close smoothly, and eventually the soft-close function breaks entirely. A drawer that once closed with a satisfying swish now slams or gets stuck halfway.
The fix: As a rule of thumb, your drawer should be 70–80% full, not 100%. If things are packed so tight you can barely fit your hand in, you've gone too far. When something new comes in, something old leaves — maintain a "one in, one out" discipline.
Prevention: During the decluttering phase, be ruthless. If the drawer is still overflowing after decluttering, you've kept too much. Go back and review using the one-year rule again.
Mistake 2: No Dividers or Wrong Dividers
The problem: Without dividers, items slide around. Utensils tangle. Spoons and forks get mixed. Items shift with every drawer open and close, and the organized system becomes chaotic within days. Or, you buy dividers that don't fit your drawer (too wide, too narrow, wrong depth), and they're useless.
The fix: Measure your drawer before buying dividers. Width, depth, height — all of it. Bring those measurements to the store or use them when shopping online. Start with adjustable dividers if you're unsure about optimal zone sizes; you can always refine later.
Prevention: The right dividers prevent items from sliding. Test-fit before committing to a purchase. If you're renting and can't install permanent dividers, use repurposed containers or cardboard to create zones — it's temporary but functional.
Mistake 3: Treating Drawers as Catchalls
The problem: Without a clear rule about what can go in a drawer, everything ends up there. Takeout menus, rubber bands, mystery keys, expired coupons, batteries, and a 2019 grocery list all share space with actual kitchen tools. The drawer becomes a junk drawer, and your organization system is dead on arrival.
The fix: Establish a clear rule: "This drawer stores only items used in kitchen routines. Everything else goes elsewhere." Create a small basket elsewhere in the kitchen or office for non-kitchen items. Make it easy for family members to know what belongs and what doesn't.
Prevention: When something arrives in your kitchen (a new gadget, a menu, etc.), decide its home immediately. Don't let it default to the organized drawer.
Mistake 4: Ignoring Drawer Dimensions and Kitchen Type
The problem: Kitchen drawers vary wildly. Modular kitchens often have standardized-height drawers; older kitchens have shallow drawers with high rails. Apartments in Bangalore with compact kitchens need different strategies than villa kitchens with oversized drawers. Generic organization advice ignores these differences, and you end up buying dividers that don't fit or organizing in ways that don't work for your space.
The fix: Understand your kitchen type:
- Modular kitchens: Drawers are usually uniform; system-based dividers work well.
- Older or traditional kitchens: Drawers vary in depth and width; adjustable dividers are your friend.
- Small apartment kitchens: Every inch counts; maximize vertical storage within drawers using double-stacking or custom inserts.
- Bangalore climate: Humidity and heat affect materials — stainless steel or sealed plastic resists rust and warping better than unsealed bamboo or plywood inserts.
Prevention: Before buying anything, assess your kitchen type and climate. This single step prevents wasted money and wasted time.
Mistake 5: Forgetting the Maintenance Plan
The problem: You organize the drawer, and for two weeks it's perfect. Then life happens. Items get returned to the wrong zone. New items arrive without designated homes. No one's maintaining the system because there's no routine. Within months, the drawer is back to chaos.
The fix: Build in a simple maintenance ritual. Every quarter (March, June, September, December), spend 15 minutes reviewing the drawer:
- Return items to their zones.
- Remove expired items (spices, condiments).
- Adjust zones if your routine has changed.
- Reinforce labels if they're fading.
This quarterly 15-minute ritual is the difference between organization that sticks and organization that fails. Professional organizers call this the "maintenance phase" — it's not optional.
Prevention: Schedule these maintenance dates. Add them to your calendar. Get your household to participate (make it a quick family task — "Drawer check, everyone!")
Organizing for Your Kitchen Type and Bangalore Climate
Organization isn't one-size-fits-all. Your kitchen's age, layout, and location shape how you should organize. For Bangalore residents especially, climate is a crucial factor.
Modular Kitchens
Modern modular kitchens usually feature uniform drawer depths and widths with standardized hardware. This is your advantage: system-based dividers work beautifully here.
- Invest in modular insert systems that fit perfectly.
- Soft-close drawers are standard; avoid overstuffing them.
- Stainless steel or high-grade plastic inserts complement the modern aesthetic.
Traditional or Older Kitchens
Drawers vary in size and depth. Rails may be simpler (non-soft-close). This flexibility allows creativity but requires measurement.
- Use adjustable dividers that you can customize per drawer.
- Consider budget-friendly options (repurposed containers, cardboard dividers, drawer liners) — you might refine the system later.
- Work with the drawer as it is rather than fighting its limitations.
Small or Compact Kitchens
Every inch matters. Vertical thinking is essential.
- Use deep drawers with custom inserts that maximize height.
- Consider double-stacking (shallow compartments with a removable top layer) to use the full drawer depth.
- Prioritize frequently used items in prime real estate; reserve deeper or harder-to-reach areas for occasional items.
Bangalore's Humidity and Climate Considerations
Bengaluru experiences high humidity, especially during monsoon season (June–September). This affects drawer organization materials:
- Bamboo and untreated wood: Attractive but absorb moisture, leading to swelling and warping. Not ideal for humid kitchens unless sealed or treated.
- Stainless steel: Resists rust and humidity. Premium option; worth the investment in Bangalore's climate.
- Sealed or laminated wood: Good middle ground — protected from moisture while remaining aesthetically warm.
- Plastic and polypropylene: Budget-friendly, moisture-resistant, easy to clean. Practical for Indian kitchens with high humidity.
- Ventilation: Ensure your drawer has minimal air gaps to moisture, but also consider ventilation to prevent trapped humidity. Deep drawers benefit from occasional opening to air dry.
Pro tip for Bangalore residents: During monsoon season, add a small silica gel packet inside deep drawers storing items you want to keep dry (spice mixes, specialty items). Replace or recharge them monthly.
Drawer Organization Solutions: Dividers, Trays, and Tools
Once you've decluttered and planned your zones, it's time to choose the physical tools that will hold your organization in place.
Types of Drawer Organizers
Expandable compartment dividers: These are bamboo, plastic, or wood rods that adjust to fit your drawer width. They're flexible, allowing you to create custom-sized compartments on the fly. Pros: adjustable, don't damage drawer surfaces, affordable to start. Cons: can shift if drawer is pulled too hard, may not work in very deep drawers.
Bamboo or wood trays: Pre-formed trays sized for standard kitchen drawers. Pros: beautiful, warm aesthetic, eco-friendly, work well in modular kitchens. Cons: expensive, less customizable once purchased, can warp in humid conditions unless sealed, often not suitable for Bangalore's climate without treatment.
Stainless steel inserts: Modular metal compartments, often with rails or sliding mechanisms. Pros: durable, professional appearance, humidity-resistant, work well with Bangalore climate. Cons: expensive, can have sharp edges, may need professional installation.
Plastic or polypropylene organizers: Lightweight, affordable, come in many shapes and sizes. Pros: budget-friendly, moisture-resistant, easy to clean, widely available. Cons: can feel flimsy, may discolor over time, less aesthetically refined than wood or metal.
Custom inserts for modular kitchens: Built into the drawer during kitchen installation or added later via custom fabrication. Pros: perfect fit, tailored to your kitchen, permanent solution. Cons: expensive, not adjustable, requires professional installation.
DIY options: Repurposed containers (small boxes, jars, unused organizers from other spaces), cardboard dividers, drawer liners, or cling film to prevent sliding. Pros: free or very cheap, customizable, good way to test a system before investing. Cons: temporary, less durable, require more maintenance.
Materials: Bamboo, Stainless Steel, and Plastic
Bamboo:
- Pros: sustainable, warm appearance, lightweight, affordable for wood
- Cons: absorbs moisture (problematic in Bangalore's humidity), can warp or develop mold, needs occasional treatment or sealing
- Best for: dry climates, modern kitchen aesthetics, environmentally conscious households
- For Bangalore: choose sealed bamboo or consider alternatives
Stainless steel:
- Pros: extremely durable, rust-resistant, professional appearance, humidity-proof (ideal for Bangalore)
- Cons: expensive, can feel cold or industrial, may have sharp edges
- Best for: commercial or professional kitchens, humid climates, long-term investment
- For Bangalore: excellent choice, especially for spice drawers or areas prone to moisture
Plastic/Polypropylene:
- Pros: affordable, lightweight, moisture-resistant, easy to clean, comes in many colors
- Cons: can feel cheap, may discolor with age or heat, less durable than wood or metal
- Best for: renters, budget-conscious households, climate-challenged spaces, families with kids
- For Bangalore: great practical option; humidity won't damage it
Premium Features Worth Considering
Soft-close mechanisms: Some organizers include soft-close hardware that slows the drawer as you close it, preventing slamming. Pros: extends the life of your organization system, protects the drawer glides, creates a satisfying user experience. Cons: significantly more expensive, may not fit all drawer types.
Adjustability: Dividers that expand or adjust to fit different widths or depths. Pros: you can refine your zones over time, one system works for multiple drawer sizes. Cons: can be fiddly to adjust, may shift if not secured properly.
Anti-slip surfaces: Bases with rubber or non-slip coating. Pros: prevent items from sliding as you open and close the drawer, especially valuable for utensils. Cons: harder to clean, can wear over time.
DIY Options vs. Professional Solutions
DIY with simple tools (repurposed containers, drawer liners, cardboard dividers):
- Cost: ₹0–500 per drawer
- Time: 30 minutes to 2 hours
- Best for: renters, testing a system, budget-conscious households, temporary solutions
- Durability: 6–12 months before requiring replacement or refinement
Ready-made organizer systems (expandable dividers, plastic inserts, bamboo trays):
- Cost: ₹500–2,000 per drawer
- Time: 1–3 hours (installation depends on type)
- Best for: homeowners, permanent solutions, those wanting a polished look
- Durability: 2–5 years depending on material and use
Professional custom solutions (built-in inserts, modular systems, professional installation):
- Cost: the highest of the three; it depends on the inserts and the installation work involved
- Time: depends on installation (professional handles it)
- Best for: modular kitchens, high-use drawers, long-term investment
- Durability: 5–10+ years, often backed by warranties
For most Bangalore households, a middle-ground approach works best: invest in a quality expandable divider system (₹1,000–1,500) paired with some custom containers or DIY solutions for specific zones. This gives you flexibility to adjust over time without the full custom cost.
Creating Task-Based Zones: Practical Examples
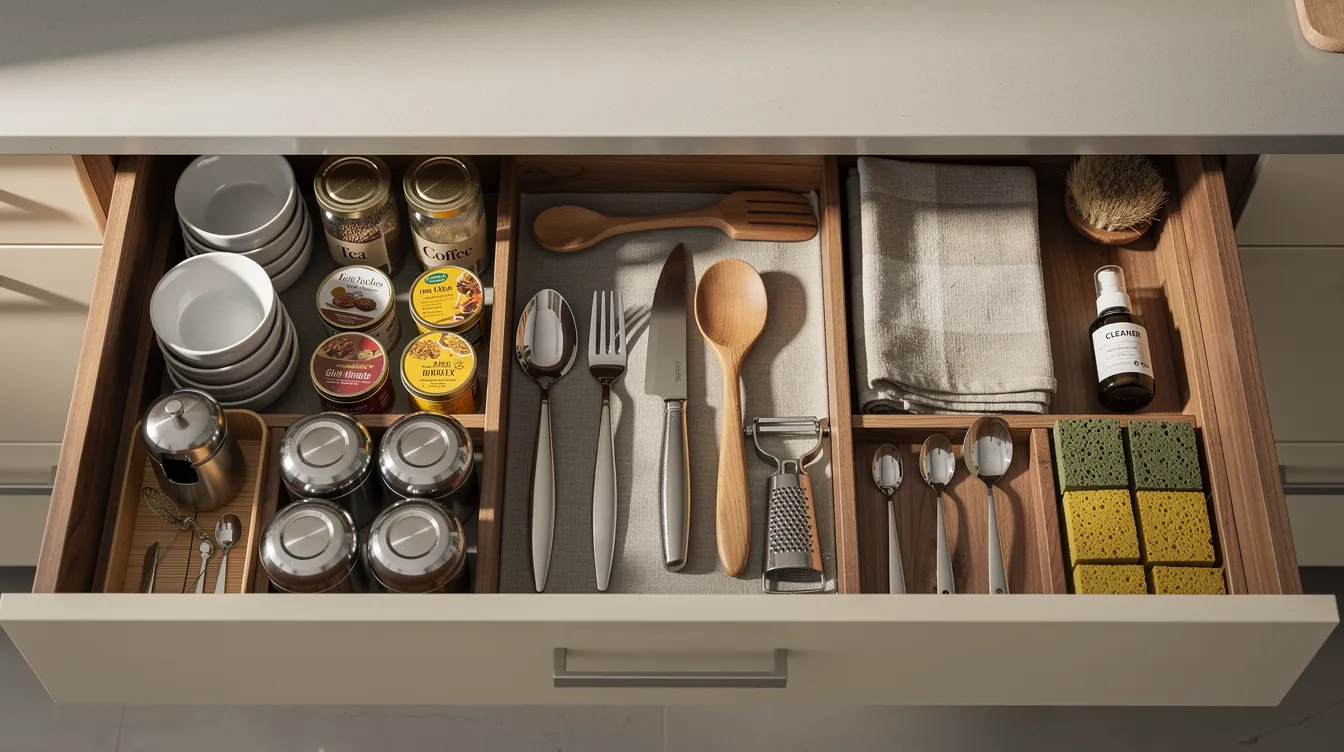
Here's how to apply zone-based organization to your specific kitchen routines. These examples work for families of 2–4; adjust based on your household size and cooking habits.
The Coffee Station Zone
Items: coffee scoop, filter basket (if you use ground coffee), sugar spoon, sometimes a small measuring spoon
Layout: Place these items in the corner of your drawer closest to your coffee maker or coffee storage. When you wake up, you reach into one small zone and have everything you need for your morning ritual.
Why it works: You perform this routine in the same spot (usually near the coffee maker or sink). Grouping items by location reduces morning friction.
The Meal Prep Zone
Items: chef's knife (or vegetable knife if you use one), scissors, vegetable peeler, julienne peeler, cooking spoon, tongs, wooden spatula
Layout: Position these near the center of the drawer for easy access. These tools get heavy use during meal prep, so place them where your hand naturally reaches when you start cooking.
Why it works: You grab these sequentially during the same activity (chopping, stirring, flipping). Having them adjacent saves time and creates a natural workflow.
The Cleanup Zone
Items: dishwasher loading tongs, sink scrubber, pot scraper, drying-rack organizer tongs (if you hand-wash)
Layout: Place these in the zone nearest the sink or dishwasher. These tools are used during the final part of your kitchen routine.
Why it works: Grouping cleanup tools near where you'll use them makes it easy to maintain the organization — you return items immediately after use.
The Utensil Zone
Items: forks, large serving spoons, regular spoons (for eating), sometimes larger cooking spoons
Layout: Use dividers to separate by utensil type. Large spoons on one side, forks on another, eating spoons in a third compartment.
Why it works: Though this uses category-based (not task-based) organization, it's necessary for frequently used items. You grab utensils for multiple tasks, so grouping by type is more efficient than by ritual.
The Spice or Condiment Drawer
Items: powders (chili powder, turmeric, etc.), whole spices (cumin seeds, mustard seeds, cinnamon sticks, bay leaves), condiment bottles (soy sauce, fish sauce, sesame oil)
Layout: For Indian kitchens with large spice collections, dedicate zones:
- One compartment for powders (labeled and organized by use frequency)
- One for whole spices (in small jars for easy pouring)
- One for bottled condiments, arranged by use frequency (most-used forward)
Why it works: Spice drawers are particularly prone to chaos because items are small, often have poor labels, and are easy to forget. Organizing by use frequency (daily spices forward, occasional spices back) saves time during cooking.
Labeling and Maintenance: Keeping Your Drawer Organized Long-Term
The final 20% of drawer organization — labeling and maintenance — determines whether your system thrives or fails. This is where many people stumble.
Labeling Best Practices
Why label at all? If you live alone, you might remember that the left compartment is the "coffee station." If you live with anyone else, labels are non-negotiable. They communicate the system to your household, and they remind you where things go when you're distracted or in a hurry.
Labeling methods:
Washi tape + label maker: Print small labels and stick them on washi tape (removable, won't damage drawer finishes). This is the most durable, professional-looking option.
Hand-written kraft labels: Cut small pieces of kraft paper, write the zone name in marker, and tape them with washi tape. Budget-friendly, replaceable, charming.
Printed color labels: Print zone names on colored sticker paper and apply directly to the organizer. Bright and easy to see; can be less durable.
Photo labels: Take a small photo of the zone's contents and print it (3×2 cm) and tape it near the zone. This works especially well for families with kids or multilingual households.
Embossed or engraved labels: For permanent solutions (wood inserts, stainless steel), engrave or emboss the zone name directly into the material.
What to label:
- Every zone (even obvious ones like "coffee")
- Spice jars (especially if they're not clearly labeled themselves)
- Rarely-used items (so you remember what's there)
- Kids' zones (so they can return items independently)
What not to label: Frequently-used items that are self-evident (forks, spoons, large spatulas) — over-labeling creates visual clutter.
The Quarterly Check-In: Maintenance Ritual
Here's the secret ingredient that separates successful, sustained organization from organization that falls apart: a quarterly 15-minute check-in.
When to do it: Pick dates — March 1, June 1, September 1, December 1 — and add them to your calendar. Tie it to seasonal changes (after spring cleaning, before the monsoon, after major holidays). Make it a recurring event so it's not optional.
What to do (15 minutes):
Pull everything out (2 minutes): Empty the drawer completely.
Review and remove (5 minutes): Look at each item. Does it belong here? Is it broken or expired? Is it something you still use? This is a mini-declutter.
Return to zones (5 minutes): Place items back, ensuring they're in their correct zones. Straighten labels if needed.
Adjust zones if needed (3 minutes): If your routine has changed (you're cooking less, entertaining more, started a new hobby), adjust the zone sizes or contents.
Make it a household event: If you live with others, make the quarterly check-in a family activity. Put on music, give everyone a role (kids can help remove items; a partner can handle labels). It takes 15 minutes as a group, builds awareness of the system, and increases buy-in.
Flexible Systems That Work for Growing Families
Families change. Kids grow. New hobbies appear. Your kitchen drawer system should flex with these changes.
Design with flexibility in mind:
- Use adjustable dividers rather than fixed-size compartments
- Leave 15–20% of drawer space unassigned — this is your "growth capacity"
- Choose label materials that are easily removable or replaceable (washi tape over permanent stickers)
- Review zones annually, not just quarterly, if your family dynamics are changing
Common life changes that require adjustments:
- Kids start learning to cook: Expand the meal prep zone; add a kids' safe-knife section with age-appropriate tools
- Aging parents move in: Add zones for specialized kitchen tools they need (large-handle utensils, specific spices)
- You start meal prepping: Create a dedicated meal-prep zone; adjust other zones accordingly
- Holiday entertaining increases: Expand the "serving utensils" zone before festival season
The most successful organized families are those who treat their systems as living things that evolve, not as static perfection they're trying to preserve.
Frequently Asked Questions About Kitchen Drawer Organization
How much should I spend on drawer organizers?
It depends on your timeline and kitchen type. For renters or if you're testing a system, start with DIY or budget organizers (₹0–500). For homeowners wanting a lasting solution, invest in mid-range organizers (₹500–2,000 per drawer). Custom built-in inserts cost the most and are worth considering only if you have a high-end modular kitchen and plan to stay in your home for 5+ years.
What if my drawers are different sizes?
Use adjustable, expandable dividers rather than fixed-size trays. Measure each drawer independently before buying, and look for dividers that accommodate a range of widths. Alternatively, use different organizer systems for different drawer sizes — don't force a one-size-fits-all approach.
How do I organize a spice drawer specifically?
Dedicate one drawer (or one section of a drawer) to spices alone. Use small labeled jars or containers for easy visibility and pouring. Organize by use frequency (daily spices forward, occasional ones back) or by type (powders, whole spices, bottled condiments). Label each container and the zones clearly, especially in Indian households with large spice collections.
Can I use dividers in shallow drawers?
Yes, but adjust your expectations. Shallow drawers limit what you can store. Use narrow, low-profile dividers or repurposed containers that fit the drawer's height. Focus on one type of item per shallow drawer (e.g., cutlery only, or utensils only) rather than trying to create multiple zones.
What's the best way to organize a utensil drawer?
Use dividers or compartments to separate by type: forks in one section, spoons in another, large serving utensils in a third, and specialty utensils (cake servers, fish forks) in a fourth. This category-based approach works well for frequently-used items that you grab for multiple tasks. Add labels so family members return items to the correct section.
How do I prevent items from shifting around as I open and close the drawer?
Use dividers (compartment dividers or trays) to contain items. Add drawer liners or non-slip mats to the bottom of the drawer to reduce sliding. Use organizers or containers within zones to group small items together so they don't scatter. Avoid overstuffing, which causes items to shift and push against dividers.
Can I DIY my drawer organization?
Absolutely. Repurposed containers (small boxes, jars, mason jars), cardboard dividers, drawer liners, and cling film all work. DIY is especially good for renters or if you're testing a system before investing. Many successful kitchens use a hybrid approach: budget DIY elements for experimental zones and one or two quality organizers for the most-used zones.
Should I organize by zone or by category?
Both. Use zone-based organization (task-based grouping) for highly-used drawers where your workflow matters (meal prep drawers). Use category-based organization (like with like) for utility items like utensils where you're grabbing multiple items for different purposes. Many successful kitchens use a mix: zones for specialized drawers, categories for general-purpose ones.
How often do I need to reorganize my drawer?
Do a light maintenance check every month (return items to zones, straighten labels) and a full quarterly review every 3 months (remove, review, adjust). You rarely need a complete reorganization unless your kitchen routine or household makeup changes significantly (new family member, major cooking style shift, etc.).
Is it worth hiring a professional organizer for kitchen drawers?
If you've tried DIY and it didn't stick, or if you have a complex kitchen layout and want a customized solution, yes. A professional organizer can assess your kitchen type, family workflow, and space constraints, then design a system tailored to you. They're especially valuable for Bangalore residents navigating humidity and climate considerations, or households with specific accessibility needs.
Key Takeaways: When to Call a Professional
You can tackle kitchen drawer organization as a DIY project, but sometimes professional help makes sense. Here's when to consider it — and what Tidy Blueprints offers.
You've Tried DIY and It Didn't Stick
If you've organized your drawers before and they returned to chaos within weeks, the issue might be system design, not discipline. A professional can help you build a system aligned with your *actual* behavior, not aspirational behavior.
Your Kitchen Layout Is Complex
Mismatched drawer sizes, odd layouts, climate challenges (Bangalore humidity), or modular kitchen systems can be tricky to navigate. A professional assesses your unique space and recommends solutions that actually fit.
You Want a Lasting System
Professionals don't just organize — they design systems for maintenance. They teach you the quarterly check-in ritual, label strategically, and ensure every family member can maintain the organization long-term.
Ready to Transform Your Kitchen?
Kitchen drawer organization doesn't have to be stressful. Whether you're ready to DIY or want expert guidance, Tidy Blueprints is here to help. We offer a free online consultation to discuss your kitchen, understand your workflow, and design a system that actually works for your home and your family.